MON - FRI 8AM - 5PM
(86) 159 6789 0123
2024-09-18
Table of content
Fences are an important property of any family. However, exposure to the natural environment 365 days a year will indeed cause damage to your wooden fence. By keeping your fence clean and well-maintained, you can avoid costly repairs later.
Fortunately, the pressure washer you buy can give an old wooden fence a new look. Due to the high-pressure water, it can shorten the time to complete this task.
This article is designed to provide a comprehensive, step-by-step guide on how to power wash and renovate your fence. We'll cover everything from safety precautions and equipment selection to techniques and post-cleaning care so you can get professional results without breaking the bank. While this article focuses on wood fences, the same ideas can be applied to vinyl fences.
Before you begin power washing your fence, you must take the necessary safety precautions. By taking the necessary safety precautions and preparing the area, you will be ready to tackle the power washing process with confidence.
Never point the nozzle of a pressure washer at yourself, other people, animals, or delicate objects such as windows or light fixtures. High-pressure water streams can cause serious injuries.
Pay attention to the pressure setting for delicate surfaces such as wood or vinyl to avoid damaging them.
To prevent electrical hazards when using an electric pressure washer, make sure the power cord and extension cord are rated for outdoor use and are adequately grounded.
Use a gasoline/diesel pressure washer in a well-ventilated outdoor area to avoid exhaust fumes from building up.
Follow the manufacturer's instructions for handling and mixing cleaning chemicals or detergents. Avoid mixing incompatible chemicals or using chemicals that may react dangerously with each other.
Make sure the pressure washer is placed on a stable and level surface to avoid tipping or moving during operation.
Before starting the pressure washer, check that all connections, hoses, and fittings are secure and free of leaks or damage.
When operating a pressure washer, use smooth, sweeping motions and avoid holding the nozzle in one position for long periods of time to prevent damage, especially on delicate surfaces.
There are several types of pressure washers available, including electric, gasoline, and diesel models. A pressure washer with a pressure rating between 1,500 and 2,500 PSI (pounds per square inch) should be sufficient for most fence cleaning jobs. If you want to peel off the paint on the wooden fence, you need to choose a pressure washer with a pressure range of 3,000 PSI to 4,000 PSI. Consider the flow rate of the pressure washer, which is measured in gallons per minute (GPM). A higher flow rate can help clean dirt and debris more effectively.
Different nozzles are designed for specific cleaning tasks and fence materials. Some common nozzles include:
Wide fan nozzle (25°-40°): Good for large cleaning areas, such as wooden fences.
Narrow fan nozzle (0°-15°): Ideal for cleaning tight spaces, such as between fence panels.
Turbine nozzle: Increases water pressure and flow rate to get tough cleaning jobs done.
Soft brush nozzle: Gentle on surfaces, ideal for cleaning delicate materials like vinyl or aluminum.
You can choose a nozzle with adjustable settings for different spray patterns and pressure levels. This versatility is handy for cleaning fences with varying dirt and grime buildup.
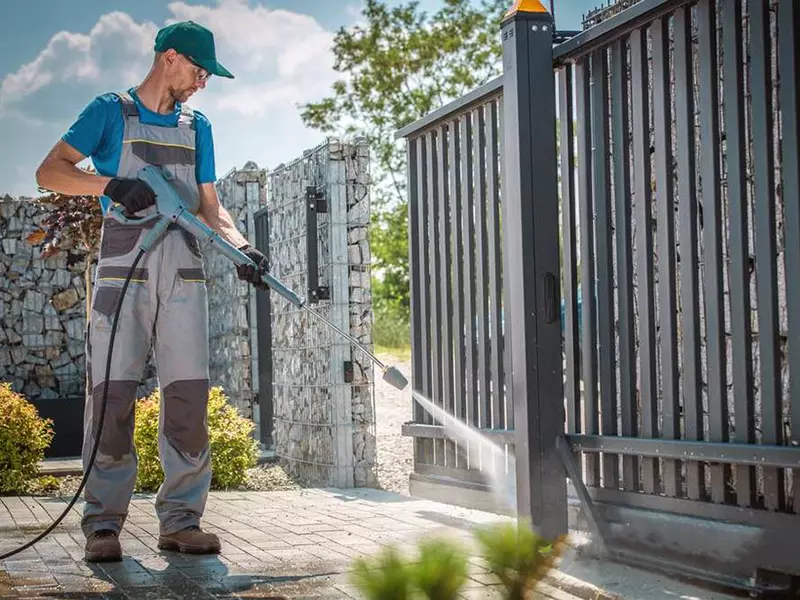
Wear appropriate personal protective equipment, such as gloves to protect your hands from debris and water splashes, and sturdy boots to prevent foot injuries from slips. Wear goggles or safety glasses to protect your eyes. If the pressure washer is loud, you should wear earmuffs. Wear long pants and a long-sleeved shirt to protect your skin from the high-pressure water spray.
If you need to remove stubborn stains or mold, you may need a cleaning solution designed specifically for fence cleaning. Additionally, choose a soap or detergent that is biodegradable and environmentally friendly to minimize harm to plants, animals, and the surrounding environment.
A long, durable hose is essential to reach all areas of the fence.
Before you begin power washing, inspect the fence for any damage or issues that could affect the washing process. Check for:
Loose boards or nails that may be washed away by the high-pressure water stream. Rot or decay may be exacerbated by power washing. Repair or replace any damaged parts before beginning the cleaning process.
Debris, such as leaves or branches, may get stuck in the fence. Clear all debris from the fence to ensure a smooth washing process.
Now that you have prepared the area and assessed the condition of the fence, it is time to begin the power washing process. Follow these steps to ensure a thorough and safe cleaning:
Assemble the pressure washer according to the manufacturer's instructions. Make sure all connections are secure, and the hose is properly connected.
Attach the nozzle to the end of the hose and make sure it locks securely in place.
Start the pressure washer and adjust the setting to the recommended pressure for the fence material.
Test the pressure washer on an inconspicuous area of the fence to determine the proper pressure setting and distance to avoid damage
If your fence has stubborn stains, mold, or algae growth, consider applying a cleaning solution designed for power washing. Switch the pressure washer's detergent tank to "on" and begin applying the cleaning solution from the bottom up. Start at one end of the fence and spray the cleaning solution. As the cleaning work progresses, the cleaning solution sprayed first will have done its job.
Wash the fence starting at the top and working your way down. This will help prevent dirt and debris from running down the fence and causing streaks.
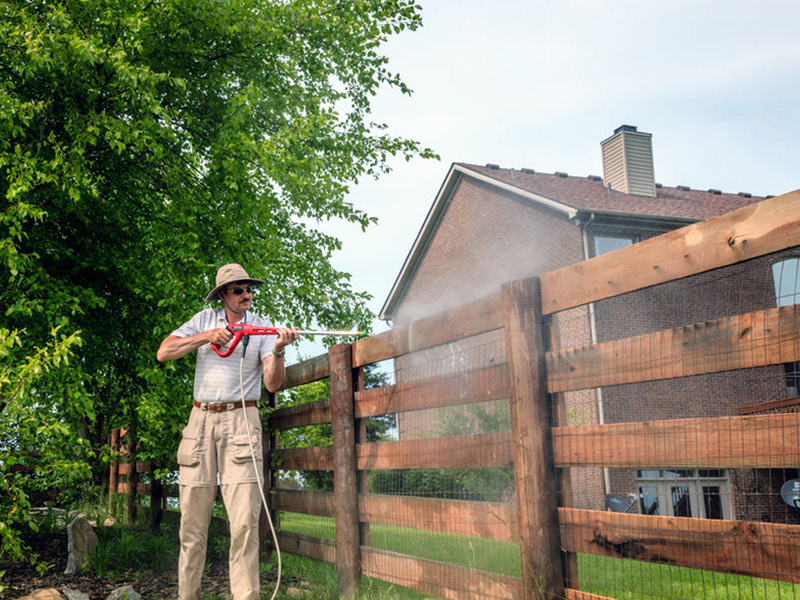
Keep the pressure washer nozzle at a constant distance from the fence surface, usually about 12 to 18 inches, to avoid damage. (Adjust the distance depending on the power of the pressure washer and the condition of the fence material).
Sweep the pressure washer nozzle, overlapping slightly each time to ensure complete cleaning coverage. Avoid using circular motions or focusing the spray on one spot for a long time, especially on softwood surfaces.
Divide the fence into manageable sections and focus on cleaning one section at a time to ensure thorough cleaning.
If you encounter stubborn stains or mold, don't be afraid to spend a little more time dealing with them. Here are some tips:
Reapply the cleaner and let it sit for a few minutes before rinsing.
Increase the pressure setting but be careful not to damage the fence.
Use a soft-bristle brush to gently scrub the stain, working from the outside in.
After completing the cleaning process, rinse the fence thoroughly with clean water to remove any remaining dirt and cleaning solution. Again, use a wide fan nozzle to start at the top and work your way down to prevent streaks. Afterwards, inspect the fence for any remaining spots or damage and treat it as needed. This part of the operation also allows you to thoroughly rinse the pressure washer to remove any residual chemicals to prevent corrosion or damage to the equipment. After cleaning, inspect the fence to ensure that all dirt, grime, and cleaning solution residue have been removed. Pay special attention to any areas that may need additional cleaning or touch-ups.
After use, disconnect the pressure washer and squeeze the trigger on the spray bar to release any remaining pressure. Afterwards, disconnect the power source (unplug an electric pressure washer or turn off a gas-powered unit) and allow the unit to cool before storing it in a dry, ventilated area away from moisture and extreme temperatures. Remember to coil and store hoses and extension cords to prevent tripping hazards and damage.
After completing the power washing process, allow the fence to dry completely. Once your fence is completely dry, it is important to repaint it to prevent it from being damaged by the sun and wind. Don't miss any edges, cover any exposed wood as much as possible. After the paint dries, your fence will look new.
In this article, BISON walks you through the process of power washing your fence, from preparation to post-cleaning care. Regular power washing helps maintain the appearance and life of your fence, depending on your local climate, fence material, and other factors. In general, it is recommended to power wash your fence:
In areas with high humidity or heavy rain, wash it every 6-12 months
In areas with moderate weather conditions, wash it every 12-18 months
In areas with dry or low humidity climates, wash it every 18-24 months
If you are not comfortable with power washing your fence yourself, or your fence is large or complex, consider hiring a professional to do the job for you.
When it comes to choosing a pressure washer and cleaning accessories, BISON is your best choice. BISON pressure washers are designed to provide powerful cleaning performance and durability, perfect for tackling tough fence cleaning jobs. Our range of cleaning accessories, including nozzles, hoses, and more, are designed to work seamlessly with our pressure washers to help you achieve professional-grade cleaning results.
So, what are you waiting for? Start cleaning today!
related blog
Acquire all kinds of knowledge from professional China factory
The high-pressure cleaner is equipped with various tools and accessories designed to make your cleaning faster, more efficient, and most importantly, easier.
This comprehensive guide will help you understand pressure washer surging/pulsing, including the issue, its causes, how to diagnose it, and ultimately, how to fix it.
BISON delve into the world of quieter gas pressure washers. We will explore the reasons behind the loud operation of gas pressure washers, effective methods to reduce their noise output...
related product
Quote high quality products from professional China factory